
Most bathroom sink clogs clear in under 20 minutes — no chemical drain openers required. This guide covers exactly how to unclog a bathroom sink drain without chemicals, from lifting the pop-up stopper to clearing the P-trap, so you know what to do at each stage and what success looks like before moving on. The steps below are the most reliable way to clear a slow bathroom drain as a DIY fix, with no products required beyond a few basic tools you likely already own. The most common cause is a hair-and-soap-scum mass sitting just below the stopper — which means it’s fixable without major disassembly in most cases.
Disclosure: This article contains affiliate links. If you purchase through these links, we may earn a small commission at no extra cost to you. As an Amazon Associate, we earn from qualifying purchases.
Why Hair Is Almost Always the Culprit in Bathroom Sink Drains
Hair doesn’t just fall into the drain — it wraps around the pivot rod and pop-up stopper mechanism sitting just below the drain opening. Over time, soap scum coats each strand and binds the mass into a dense, sticky plug.
A bathroom sink drain clogged with hair almost always has its blockage within arm’s reach of the opening — typically within 6 inches of the drain surface. It’s not deep in the pipe. That’s exactly why physical removal beats chemical treatment for this type of clog: the blockage is close, accessible, and easy to grab with the right tool.
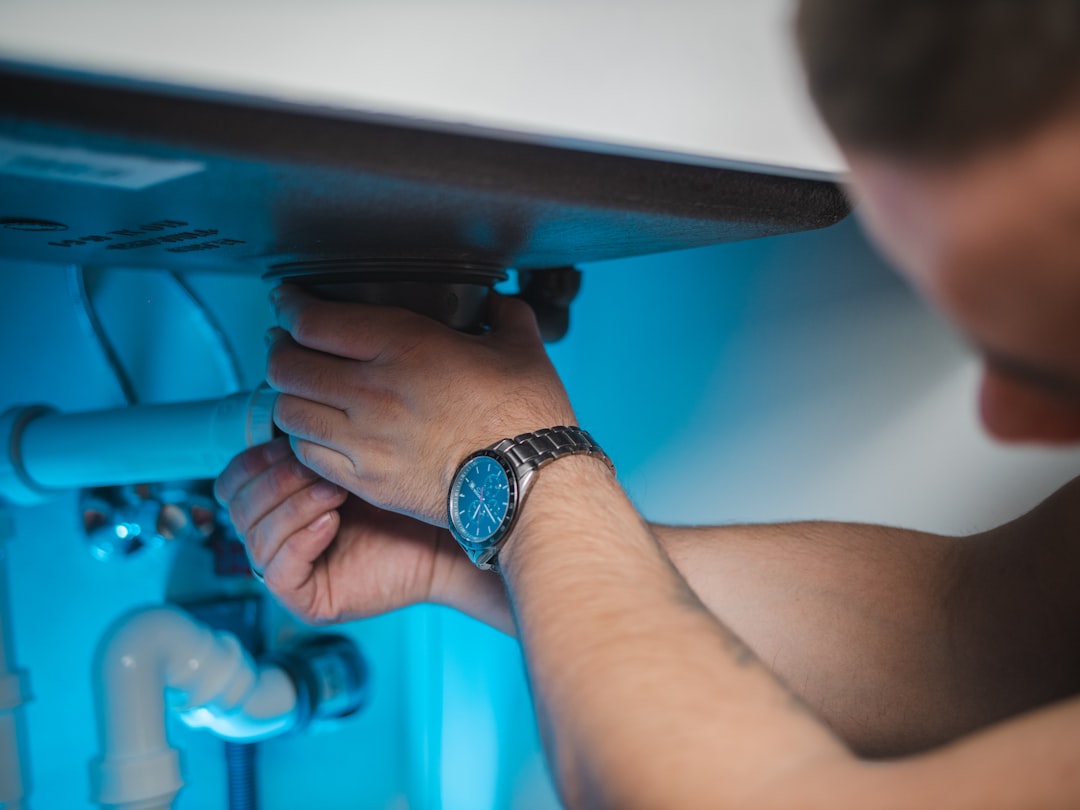
Tools You Need to Unclog a Bathroom Sink Without Chemicals
Gather everything before you start so you’re not hunting under cabinets mid-job.
- Needle-nose pliers — for pulling hair off the stopper and out of the drain opening
- Drain hair removal tool (zip-it tool) — a plastic barbed strip, roughly 18–20 inches long, that hooks hair and pulls it out; this is the single most effective tool for this job and costs $3–$6 at any hardware store (Editorial note: add affiliate/product link to zip-it tool here before publishing — primary product link opportunity identified in brief)
- Flathead screwdriver — some pop-up stopper types use a set screw to hold in place
- Small bucket and old towels — only needed if you get to the P-trap step
- Dish soap and hot tap water — for flushing after mechanical clearing
No specialty tools. No drain snake needed in most cases. A basic drain hair removal tool does the heavy lifting.
Step-by-Step: How to Unclog a Bathroom Sink Drain Without Chemicals
Work through these steps in order. Each one targets a specific location where the clog lives. Stop and test after each step — many drains clear completely by Step 3.
Step 1: Remove the Pop-Up Stopper
The pop-up stopper is the small plug that sits in the drain opening and raises or lowers when you pull the rod behind the faucet. Hair accumulates directly on this piece, so removing it comes first.
Try lifting it straight up. If it doesn’t come free, twist it counterclockwise a quarter turn and lift again. Most stoppers release this way without any tools.
Once you have it out, use needle-nose pliers to pull off the hair and soap debris wrapped around the base and underside. Discard the debris — don’t rinse it back down the drain.
If the stopper doesn’t lift or twist free, it’s held by a pivot rod underneath. Jump to the “How to Remove a Pop-Up Stopper” section below, then return to Step 2.
Step 2: Insert the Drain Hair Removal Tool
With the stopper out, insert your drain hair removal tool (or zip-it tool) into the drain opening. Push it down 4–6 inches — this reaches the area around the pivot rod where hair collects most heavily.
Rotate the tool slightly as you pull upward. The barbs catch hair on the way out. Pull slowly and steadily rather than yanking — a fast pull can cause the hair mass to break apart and fall back down.
Repeat 2–3 times, angling the tool slightly differently on each pass. Each pull should bring up visible grey-black hair and soap scum. Keep going until a pass comes back clean.
This step handles a bathroom sink drain clogged with hair in the vast majority of cases. If you want to know how to unclog a bathroom sink naturally without reaching for any products, this mechanical method is the most effective starting point.
Step 3: Flush With Hot Tap Water
Run the hottest water your tap produces for 30–60 seconds. This softens and flushes any remaining soap-scum residue clinging to the pipe walls just below where you cleaned.
Do not use boiling water. Boiling water can soften the glued joints on PVC (polyvinyl chloride) drain pipes, which is the plastic piping used in most modern homes. Hot tap water is effective and safe.
Expected result: Water drains immediately with no pooling. If you’re back to a clear, fast-draining sink, you’re done. If water still pools or drains slowly, move to Step 4.
Step 4: Use a Cup Plunger
A cup plunger — the flat-bottomed style, not the flanged toilet plunger — creates suction that can dislodge debris the zip-it tool missed or push a partial clog through.
Before you plunge, block the overflow hole. On most bathroom sinks, this is a small oval opening near the top of the basin, just below the rim. Press a wet cloth firmly against it. If you skip this step, air escapes through the overflow and the plunger won’t build suction.
Seat the plunger flat over the drain opening and pump firmly 8–10 times. Keep the plunger sealed against the drain surface throughout.
Remove the plunger and run hot water for 30–60 seconds. If the drain is now clear, you’re finished. If it’s still sluggish, the clog may be lower — continue to the section on the P-trap below.
Note: The plunger technique works exactly the same way on kitchen sinks. If you’re dealing with a slow kitchen drain, the same steps apply — see our guide on how to unclog a kitchen drain for that context.
How to Remove and Clean a Pop-Up Stopper to Reach Hidden Clogs
If your stopper didn’t lift out in Step 1, it’s connected to a pivot rod — a short horizontal metal rod that enters the drainpipe from the side and hooks into the bottom of the stopper. Here’s how to release it.
[EDITORIAL FLAG: A labeled diagram of the pivot rod, clevis strap, and stopper relationship is strongly recommended here — this relationship is difficult to visualize from text alone and a simple illustration would significantly improve this section.]
- Open the cabinet under the sink. Look at the drainpipe coming down from the sink. You’ll see a horizontal metal rod entering the pipe from the back — that’s the pivot rod.
- Find the retaining clip. The pivot rod is held against the drainpipe by a metal clip or a small plastic strap (called a clevis strap). Squeeze the clip and slide the pivot rod back just enough to unhook it from the stopper.
- Lift the stopper from above. Once the pivot rod clears the stopper, it lifts straight out. Clean off all hair and soap debris using your fingers, needle-nose pliers, and a rinse under the tap. An old toothbrush removes built-up soap scum quickly.
- Reinsert the pivot rod. Slide it back into the drainpipe until it clips securely. The angled tip should seat into the hole at the bottom of the stopper.
- Test the lift rod. Pull up on the lift rod (the post behind the faucet) — the stopper should raise and lower smoothly.
With the stopper cleaned and reinstalled, go back and complete Steps 2–4 above.
When the Drain Is Still Slow After Cleaning
If you’ve cleared the stopper, used the zip-it tool, and plunged — and the drain is still sluggish — the clog has moved past the drain opening into the P-trap.
The P-trap is the curved section of pipe directly under the sink. It holds a small amount of water at all times (which blocks sewer gases from entering your home), and it’s a common spot for debris to accumulate.
To clear it:
- Place a bucket under the P-trap to catch the water inside.
- Unscrew the two slip-joint nuts on either end of the curved section — most hand-tighten and don’t require tools, though channel-lock pliers help if they’re snug.
- Pull the P-trap free, clear out any debris, and rinse it.
- Reassemble and hand-tighten the slip-joint nuts. Run water to confirm there’s no drip at the joints.
If the P-trap is clear but the drain is still slow, the clog sits further down the drain line — beyond the P-trap. At that point, a drain snake (also called a hand auger) is the right tool to reach deeper into the pipe.
For ongoing maintenance after mechanical clearing, an enzyme drain cleaner is a gentler follow-up option that can help break down residual soap and organic buildup without harming your pipes — it’s worth running monthly once you’ve physically cleared the blockage.
Escalation point: If your drain backs up again within a few days of clearing, or if multiple bathroom drains are slow at the same time, the problem is in the branch drain line — not the sink itself. That warrants a call to a licensed plumber.
How to Keep Your Bathroom Sink Drain Clear Going Forward
The best way to unclog a bathroom sink drain without chemicals in the future is to prevent the clog from forming in the first place. A simple two-minute monthly routine handles it.
- Install a drain hair catcher. A silicone or stainless-steel mesh insert that sits over or just inside the drain opening catches hair before it reaches the stopper mechanism. Empty it once a week — the whole process takes 10 seconds. (Editorial note: add product link for drain hair catcher insert here before publishing)
- Clean the pop-up stopper monthly. Lift it out, remove any hair that’s started to accumulate, rinse it off, and drop it back in. This prevents the dense soap-scum buildup that makes clogs stubborn.
- Run hot tap water for 30 seconds after sink use. This won’t prevent clogs on its own, but it slows soap-scum buildup on the pipe walls between cleanings.
- Limit heavy soap product residue. Thick shaving creams and heavily fragranced bar soaps contribute disproportionately to the soap-scum binding layer. If you notice faster-than-usual buildup, consider the products going down the drain.
A drain that’s cleared with physical tools and maintained with a monthly stopper cleaning and a hair-catcher insert should stay clear for months between sessions. No chemicals, no service call, no waiting for a product to work — just a fast-draining sink.
FAQ
Can baking soda and vinegar unclog a bathroom sink? For a hair clog, no — not effectively. The fizzing reaction doesn’t dissolve or grab hair. It may clear very light soap film, but if hair is involved, mechanical removal is the only reliable method. If you want to know how to unclog a bathroom sink naturally, the zip-it tool approach above is your best option — it works, and it doesn’t require any products at all.
How do I know if my stopper lifts out or needs the pivot rod removed? Try lifting straight up first, then twist counterclockwise. If it doesn’t release within a few seconds, it’s attached to the pivot rod and you’ll need to access it from under the sink as described in the pop-up stopper section above.
Is boiling water safe for clearing a bathroom drain? No. Boiling water can soften the adhesive joints in PVC drain pipes. Use the hottest water from your tap — that’s sufficient and won’t damage the plumbing.
How often should I clean the drain? Empty the hair catcher weekly. Lift and clean the pop-up stopper monthly. That schedule prevents nearly all bathroom sink clogs from forming in the first place.
My drain cleared but backed up again within two days — what does that mean? This usually means the clog wasn’t fully removed, or that a deeper blockage exists in the branch drain line past the P-trap. Run through the zip-it and P-trap steps again, and if the problem persists, a drain snake or a licensed plumber is the next step.
Can I use this same method on a bathroom sink without a pop-up stopper? Yes. The zip-it tool works just as well on open drains and grid-style drain covers. Skip the stopper removal step and go straight to inserting the drain hair removal tool into the drain opening. Everything else in the sequence applies exactly the same way.

