
If you need to replace a faucet cartridge in a two-handle bathroom faucet, the good news is that this repair restores smooth, leak-free operation in about an hour with no special skills required. This step-by-step guide covers two-handle faucets specifically — where each handle has its own cartridge controlling either hot or cold water independently. Two-handle faucet cartridge replacement is one of the most practical DIY plumbing repairs a homeowner can do, and it costs a fraction of a service call. If you have a single-handle or ball-type faucet, the repair process is different and requires a separate procedure.
Disclosure: This article contains affiliate links. If you purchase through these links, we may earn a small commission at no extra cost to you. As an Amazon Associate, we earn from qualifying purchases.
What a Faucet Cartridge Does and Why It Fails in Two-Handle Faucets
A cartridge is a self-contained valve that sits inside each faucet handle. When you turn the handle, the cartridge opens or closes a water channel, controlling flow and temperature.
In a two-handle faucet, there are two cartridges — one for hot, one for cold. Each can fail independently, so you may only need to replace one.
The most common failure is worn rubber seals inside the cartridge. Over time, those seals allow water to pass through even when the handle is fully closed. A cracked cartridge body can cause the same result.
Signs that point to a cartridge problem:
- The spout drips with the handle closed
- Water seeps around the base of the handle
- The handle turns without resistance and no longer shuts the water off completely
Tools and Parts You Need Before You Replace the Cartridge
Gather everything before you shut off the water. This keeps downtime short and prevents you from leaving the job half-done to hunt for a tool. If you want a broader reference for stocking your toolkit, this guide to best home repair tools covers the essentials every homeowner should have on hand.
Tools:
- Adjustable wrench — for removing the packing nut (also called the bonnet nut) that holds the cartridge in place
- Flathead and Phillips screwdrivers — to remove the decorative cap and handle screw
- Needle-nose pliers — for pulling retaining clips without damaging surrounding parts
- Utility knife or pick — to remove old O-rings cleanly without scoring the valve seat
- Cartridge puller tool — optional, but worth having for stubborn cartridges; a cartridge puller prevents the valve body damage that can happen when you force a stuck cartridge with regular pliers
- Silicone-based plumber’s grease — required for lubricating the new cartridge before installation; more on this in the installation steps
Parts:
- Replacement cartridge — exact match to your faucet brand and model (covered in the next section)
- Replacement O-rings if your manufacturer sells them separately
Other:
- Towel or small bucket to catch residual water in the supply lines
- Smartphone to photograph cartridge orientation before removal
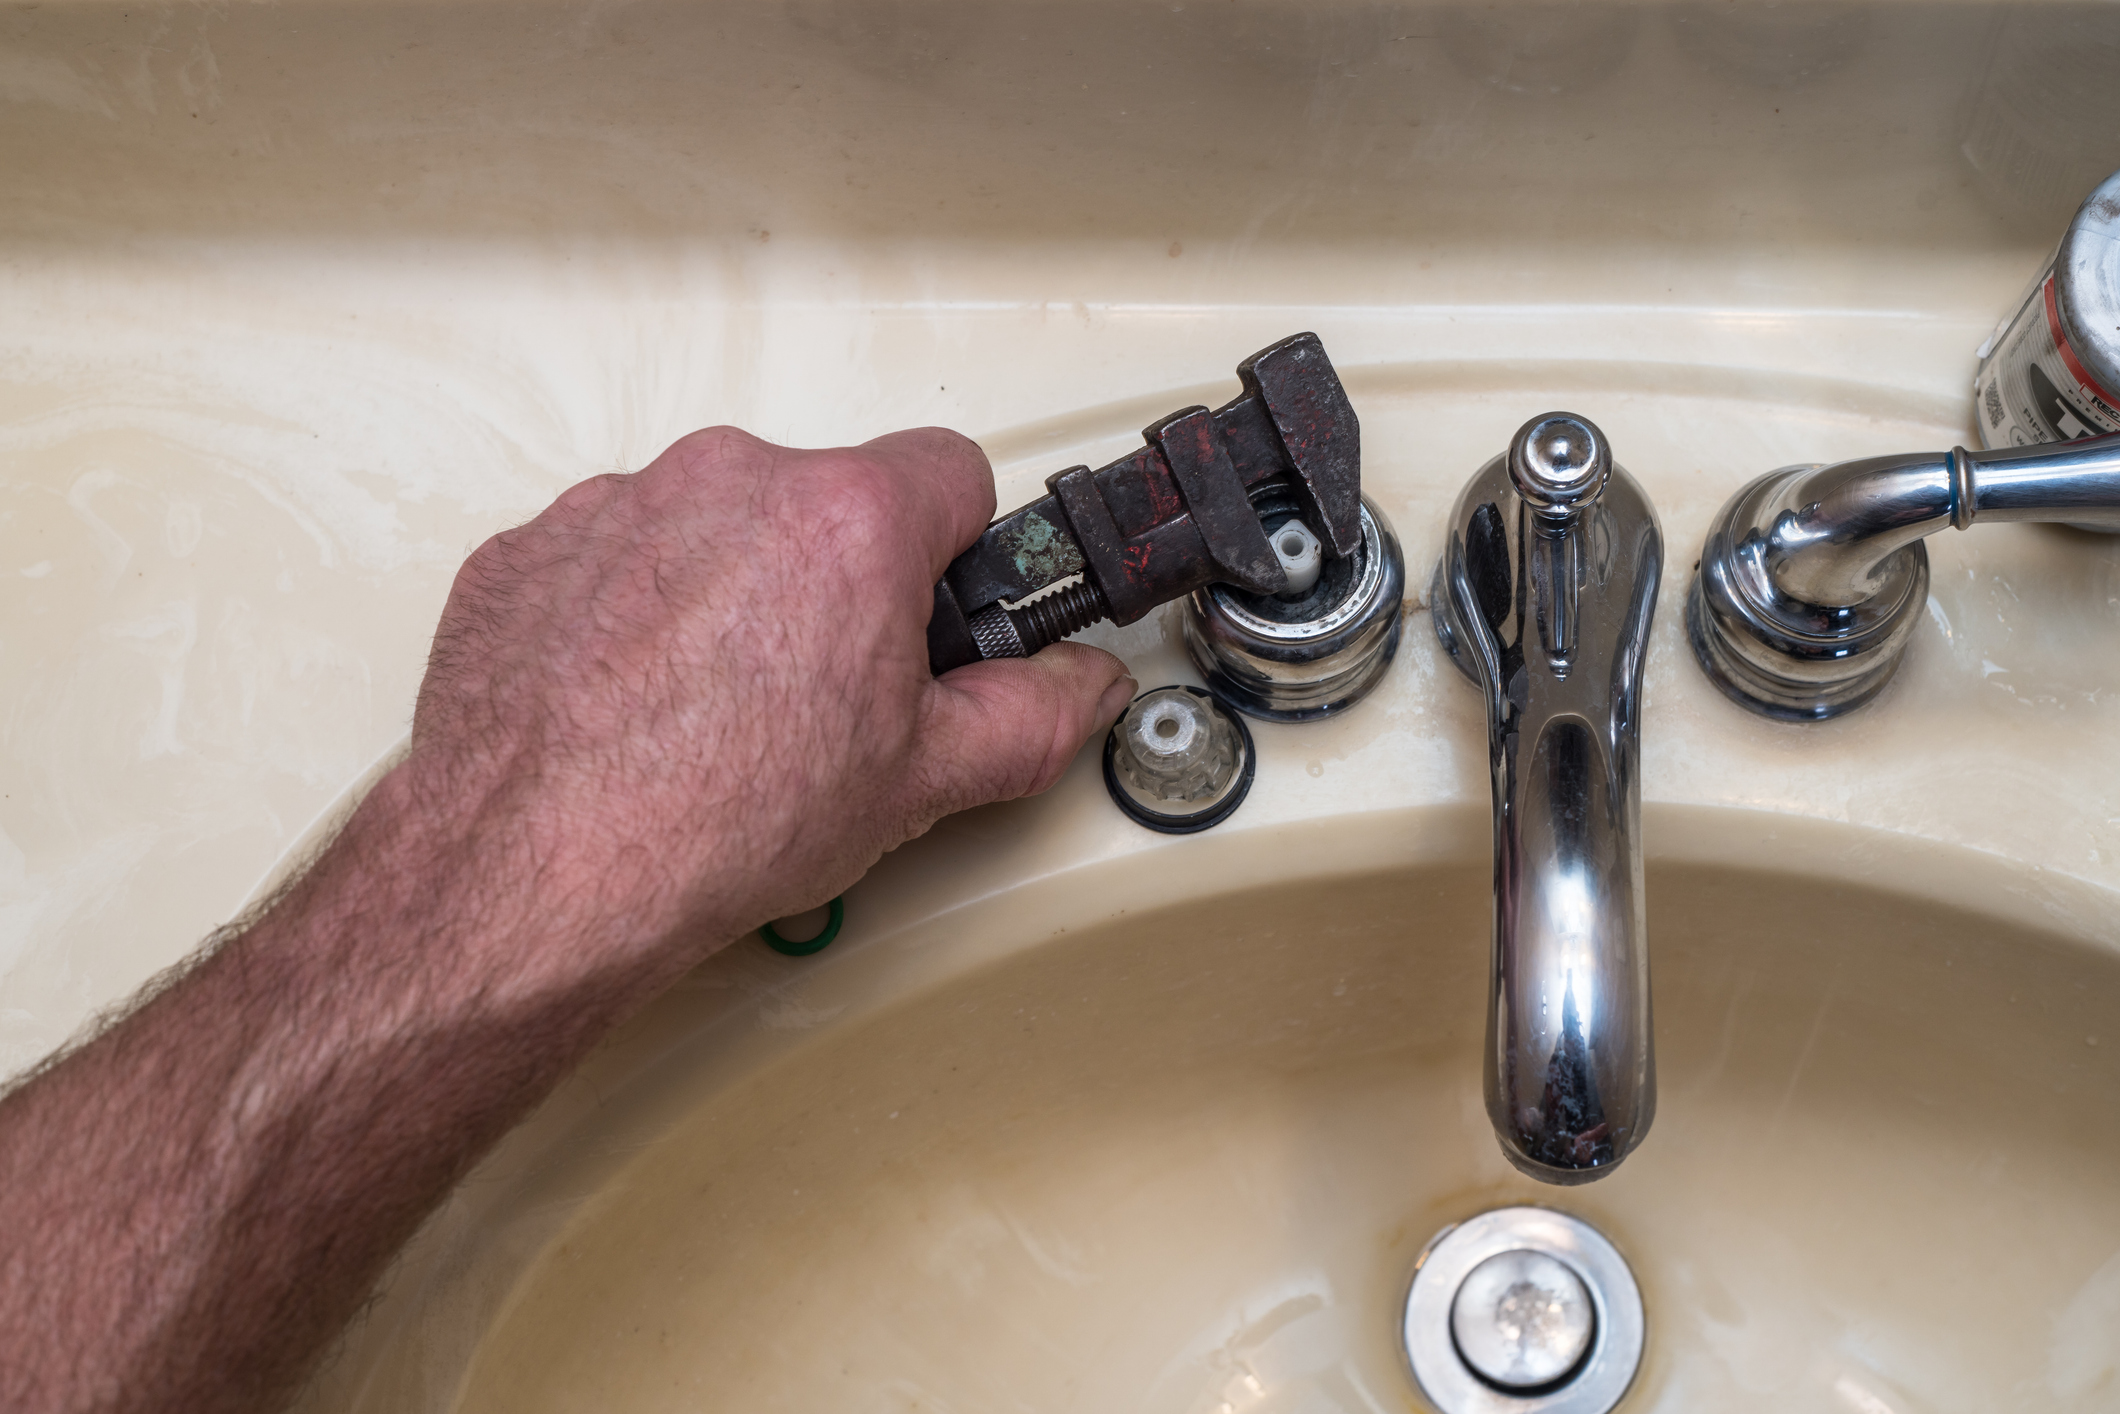
How to Remove a Faucet Cartridge from a Two-Handle Faucet Without Damaging the Valve Body
Follow these steps in order. Skipping ahead — especially the photo step — is the most common source of reassembly errors when you replace a faucet cartridge in a two-handle faucet.
Step 1: Shut off the water supply. Turn the shut-off valves under the sink clockwise until fully closed. Then open the faucet handle to release line pressure and confirm no water flows. If you are not sure where your shut-off valves under the sink are located or they do not close fully, shut off the home’s main supply valve instead. Never attempt a faucet cartridge removal with the water supply still live.
Step 2: Remove the handle. Pry off the decorative cap on top of the handle using a flathead screwdriver — it usually pops off with light pressure. Underneath is a screw, typically Phillips or hex head. Remove it, then pull the handle straight up. If it feels stuck, wiggle it gently. Do not pull it sideways — you risk cracking the handle body.
Step 3: Remove the packing nut. The packing nut (sometimes called the bonnet nut) is the large threaded collar that holds the cartridge inside the valve body. Place your adjustable wrench on it and turn counterclockwise. Keep track of the size — you will need to reseat it at the same torque during reassembly.
Step 4: Photograph the cartridge orientation. Before you touch the cartridge, take a clear photo with your phone. This step takes ten seconds and prevents a critical error: installing the cartridge rotated 180 degrees reverses hot and cold, and the handle will work backward. Your photo is the reference point for reinstallation.
Step 5: Remove the retaining clip if present. Many cartridges from Moen, Delta, and Price Pfister are secured with a small brass or plastic horseshoe-shaped clip. Use needle-nose pliers to pull it straight up and out of its groove. Set it aside — you will reuse this clip.
Step 6: Pull the cartridge out. Grip the cartridge stem firmly with pliers and pull straight up with steady, even pressure. If it does not budge, use a cartridge puller tool rather than twisting or levering. The valve body — the brass housing that stays permanently in the wall — can crack if the cartridge is forced at an angle. A puller tool applies centered, upward force that protects it.
Step 7: Inspect the valve seat. Shine a flashlight into the empty valve body. If you see mineral deposits, wipe them away with a damp cloth. If the seat surface looks visibly pitted, scored, or rough, note it — this matters for the final section of this guide.
Choosing the Right Replacement Cartridge for Your Two-Handle Faucet
This is where two-handle faucet cartridge replacement most often goes wrong. A replacement cartridge must match your specific faucet brand and model — universal cartridges exist, but they frequently fail to seat correctly and will not seal reliably.
How to identify your faucet:
- Look for a brand name stamped or engraved on the faucet body near the base
- Check under the sink for any manufacturer labels on the supply lines or faucet shank
- Review original purchase records or check home improvement store accounts if you bought it there
How to find the cartridge part number:
- The part number is often stamped directly on the old cartridge body — check it once you have it out
- Bring the old cartridge to a hardware store and match it in person
- Search the brand name plus “replacement cartridge” and your faucet model number online
Major brand notes:
- Moen — The Moen 1225 or 1222 cartridge covers many of their popular faucet lines and is widely available at hardware stores and online. Check your faucet line to confirm which applies — the 1225 and 1222 are not interchangeable.
- Delta — Two-handle Delta faucets often use ceramic disc cartridges rather than standard stem cartridges. They look different but are replaced the same way. Confirm your type before ordering.
- American Standard, Kohler, Price Pfister — All sell brand-specific cartridges through major retailers. Match the model number before purchasing.
If the cartridge number is no longer manufactured, full faucet replacement is likely more practical than sourcing an obsolete part.
How to Install the New Cartridge and Test for Leaks
Once you have the correct replacement in hand, the installation process is straightforward. These steps complete the two-handle faucet cartridge replacement and get you to a working, leak-free faucet.
Step 1: Lubricate the new cartridge. Apply a thin, even coat of silicone-based plumber’s grease to the O-rings and the exterior of the cartridge body. This allows the cartridge to seat fully and helps the seals last longer. Do not use petroleum-based grease — it degrades rubber seals over time. Silicone-based plumber’s grease is the correct product for this application.
Step 2: Align the cartridge correctly. Reference the photo you took before removal. Most cartridges have a tab, flat side, or notch that locks them into a specific orientation. Confirm the alignment before pressing anything in — once seated, it can be difficult to reposition without full disassembly.
Step 3: Press the cartridge into the valve body. Push straight down with firm, even pressure until the cartridge sits flush with or slightly below the top of the valve body. It should feel fully seated with no rocking or looseness.
Step 4: Reinstall the retaining clip. Use needle-nose pliers to press the clip back into its groove until it snaps fully into place. This clip prevents the cartridge from backing out under water pressure — do not skip it or leave it partially seated.
Step 5: Thread the packing nut back on. Hand-tighten first to avoid cross-threading, then snug it with the wrench. Tighten enough to eliminate any movement, but do not overtighten — excessive force can compress the cartridge body and restrict handle movement.
Step 6: Reinstall the handle. Seat the handle onto the cartridge stem, insert the screw, and tighten it. Then press the decorative cap back into place until it snaps flush.
Step 7: Turn the water supply back on slowly. Open the shut-off valve gradually, not all at once. Watch the handle base and spout for any drips before opening the valve fully.
Step 8: Test both hot and cold positions. Turn the handle through its full range. It should move smoothly and stop water flow completely when closed. A slow drip from the spout in the first minute is usually residual water in the line — wait 60 seconds and check again. Persistent dripping after that indicates the cartridge is not fully seated or the wrong part was installed.
What success looks like: The handle turns smoothly through its full range, shuts off completely with no drip from the spout, shows no moisture at the handle base, and hot and cold positions are correct — hot on the left, cold on the right in standard U.S. installations.
When Replacing the Cartridge Isn’t Enough — and What to Do Next
Most leaky two-handle faucet cartridge repairs go smoothly, but a few situations call for a different response.
If the new cartridge still drips after correct installation: Disassemble and check that the retaining clip is fully engaged and the packing nut is snug. A cartridge seated even slightly off-center will not seal correctly. Reseat it and test again.
If the valve seat is visibly pitted or scored: A new cartridge cannot seal against a damaged seat. Fixing this requires seat grinding with a valve seat grinder, or valve body replacement — typically a job for a plumber unless you are comfortable with more advanced valve work.
If water seeps from the wall behind the faucet: Stop immediately. This is not a cartridge issue. It points to a supply line failure or an internal leak behind the wall, and it requires a licensed plumber. If you notice any discoloration on ceilings or walls nearby, a ceiling water stain can help you determine whether the damage is from an active leak or an older issue.
If the shut-off valves under the sink don’t fully close: Address this before attempting any faucet repair. Old gate valves — the older style with a round wheel handle — commonly fail and will not fully stop flow. Replacing shut-off valves is a separate repair, and in the meantime, use the main supply shutoff to work safely.
If the faucet is very old or heavily corroded: If the cartridge is discontinued and sourcing a replacement requires back-ordering from an obscure supplier, full faucet replacement is usually more cost-effective and gives you updated valves throughout.
Frequently Asked Questions
Can I replace just one cartridge, or do I need to do both? Replace only the one that is failing. That said, if both are original and the faucet is several years old, replacing both while you have the supply off is efficient — you avoid doing the job twice in a short span.
How do I know which side — hot or cold — is leaking? The problem cartridge usually corresponds to the handle side where the leak originates. A spout drip with both handles fully closed may mean both cartridges are worn.
Do I need to turn off the main water supply to replace a faucet cartridge? Only if the under-sink shut-off valves do not work. Most bathrooms have functional individual shut-off valves, so you can isolate just that sink without cutting water to the rest of the house. If the valves fail to close fully, shut off the main before proceeding.
What if I can’t get the old cartridge out? Use a cartridge puller tool rather than forcing it with standard pliers. Twisting or levering a stuck cartridge risks cracking the valve body, which turns a simple repair into a much larger one. A cartridge puller applies straight upward force and is inexpensive at most hardware stores.
How long will a replacement cartridge last? Quality OEM (original equipment manufacturer) cartridges typically last 5–15 years, depending on water quality and usage frequency. Hard water with high mineral content shortens seal life.
Is this the same process for a kitchen faucet? The steps to replace a faucet cartridge are similar for kitchen faucets, but kitchen faucets often use different cartridge designs and sizes. The same principles apply — the specific part will differ.

